
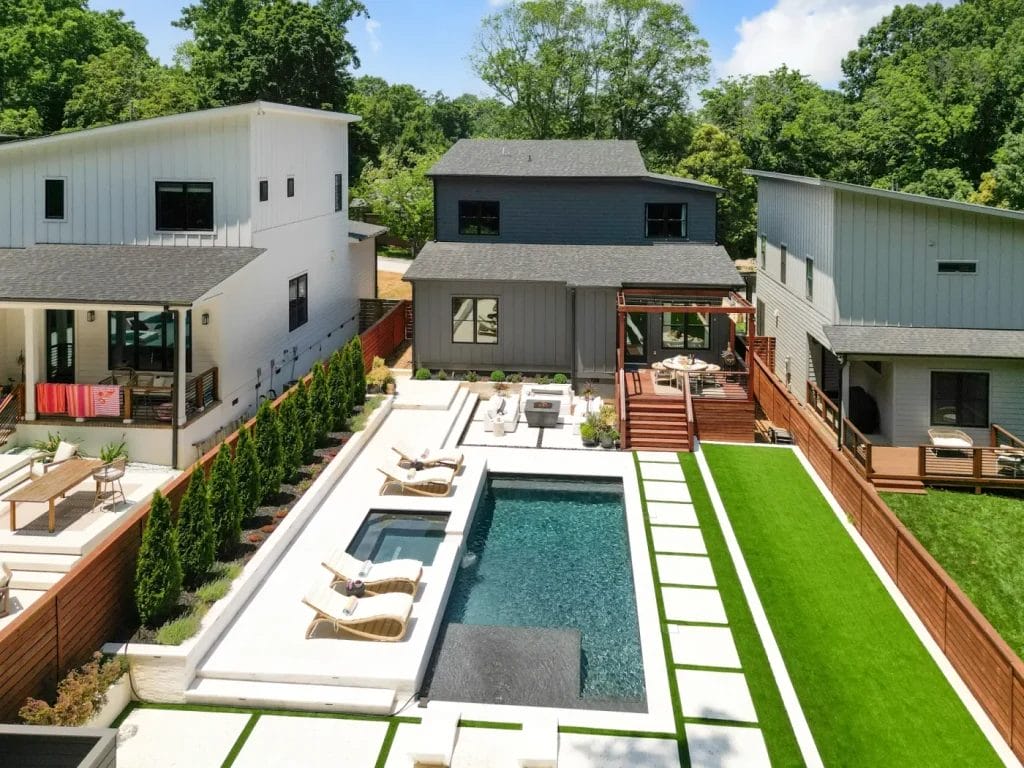
As a Superhost in Charlotte and a professional photographer, I’ve seen firsthand how poor listing photos can hurt bookings.
It’s shocking how many properties miss out just because their images don’t capture the true vibe. Good photos can boost your bookings by up to 40%.
Luckily, you don’t need to hire a pro just yet. Let’s dive into some simple tips to elevate your listing photos and attract more guests.
Key Takeaways
- Utilize natural light and golden hour photography to create soft, flattering images that showcase your property appealingly.
- Declutter and stage spaces with neutral decor, fresh flowers, and intentional furniture arrangements to maximize guest appeal.
- Use wide-angle lenses and corner positioning to capture broader perspectives and make rooms appear larger and more inviting.
- Edit photos consistently for brightness, contrast, and saturation while maintaining authenticity and avoiding unrealistic expectations.
- Consider professional photography if booking rates lag, you cannot justify nightly rates, or guest reviews mention photo-to-reality gaps.
The gap between professional and amateur Airbnb photos
When you’re listing your property on Airbnb, your photos are doing the heavy lifting—they’re the first (and sometimes only) impression potential guests get before deciding whether to book. Here’s the reality: there’s a significant gap between what you can capture with your smartphone and what professional photographers achieve.
Professional Airbnb photography tips focus on equipment, lighting, and composition that amateur shots simply can’t match. When you try to improve Airbnb photos on your own, you’re often fighting against poor lighting, cluttered backgrounds, and inconsistent image quality. Professional photographers use advanced equipment and expert techniques to create vibrant, clear images that highlight your property’s best features.
The numbers tell the story. Listings with professional photos see booking increases up to 40%. That’s because how to photograph Airbnb effectively requires understanding staging, angles, and editing at a level most hosts can’t replicate. Professional images build guest trust instantly—they signal quality and care about every detail. Additionally, professional photos enhance visibility in a competitive market, making a significant difference in attracting guests.
The single most important factor in listing photos — lighting
You can’t fake good light. When I photograph listings, I prioritize natural light above everything else—it’s that critical to your Airbnb listing photos tips. Daylight enhances color accuracy and creates the warm, inviting atmosphere guests crave. Artificial lighting often produces harsh shadows and blown-out areas that repel potential renters.
Time matters. The golden hour—shortly after sunrise or before sunset—delivers soft, diffused light that transforms ordinary rooms into stunning spaces. I’ve seen hosts shoot at noon and wonder why their photos underperform. The answer’s simple: that harsh midday sun kills the magic.
Open every curtain and blind. Maximize natural light flowing through windows. For darker spaces, use strategic lamps and reflectors to brighten areas without creating shadows.
Here’s your DIY Airbnb photography reality: consistent lighting across all photos builds a cohesive listing. Shoot everything at the same time of day. This single commitment dramatically elevates your entire presentation—though professional photographers still deliver superior results through expertise and equipment you won’t replicate alone. Investing in professional services can enhance your listing’s appeal, as seen in Airbnb Photography Pricing for Charlotte, NC.
How to use natural light for better Airbnb photos
Natural light isn’t just helpful—it’s transformative.
When you’re photographing your listing, you’re competing against thousands of other properties. Natural light is your secret weapon. It makes spaces feel larger, warmer, and genuinely inviting—exactly what potential guests want to see.
Here’s how to harness it effectively:
- Shoot during golden hour (first hour after sunrise, last hour before sunset) when light’s soft and flattering, not harsh
- Open all curtains and blinds to flood rooms with brightness, improving color accuracy and that welcoming atmosphere guests crave
- Position yourself strategically so natural light fills the room evenly, avoiding shadows that make spaces look cramped
- Use reflectors like white boards or walls to bounce light into dark corners, eliminating those unflattering shadows
Capture multiple angles showing how light interacts with architectural details and unique features. You’ll notice the difference immediately—brighter, more appealing photos that actually convert browsers into bookers.
Staging for photos — the 10-minute setup that makes a difference
The difference between a cluttered space and an inviting one? Ten minutes of strategic staging. You don’t need hours—you need intention.
Start by decluttering. Remove personal items, excess furniture, and anything that doesn’t serve your space’s story. This immediately makes rooms feel larger and cleaner, which translates directly into photos that attract more bookings.
Next, embrace neutral decor. I’ve seen hosts lose potential guests because bold personal taste overpowered the property’s appeal. Neutrals let guests imagine themselves in your space.
Add fresh flowers or plants to key areas. They introduce life and warmth without overwhelming the frame.
Finally, arrange furniture intentionally. Create inviting layouts where guests can actually envision relaxing. Highlight your kitchen and living room—these rooms drive booking decisions.
These small adjustments dramatically improve your photos. But here’s what I’ve learned: professional photographers capture what staging creates. Your effort builds the foundation; professionals elevate it into bookings.
Camera angles that make spaces look larger
While staging creates the foundation for great Airbnb photos, your camera angles determine whether that space actually looks inviting on the listing—or cramped.
I’ve watched countless hosts struggle with this exact challenge. They stage perfectly but shoot from awkward positions that make rooms feel smaller. Here’s what actually works:
- Position your camera in room corners — you’ll capture broader perspectives that create genuine depth and make spaces feel expansive
- Use wide-angle lenses — they showcase more area in single shots, essential for smaller bedrooms or studios
- Shoot from lower angles — this elevates perceived ceiling height, especially powerful in rooms with tall windows or vaulted ceilings
- Maximize natural light during day hours — bright, inviting spaces automatically feel larger and more welcoming
The difference is remarkable. I’ve photographed the same bedroom with different angles, and hosts consistently see booking improvements with corner shots using wider lenses. These techniques genuinely work. That said, professional photographers combine these skills with equipment and editing expertise that DIY efforts simply can’t match.
What smartphone settings to use for interior photography
Your smartphone’s got incredible potential for interior photography—but only if you’re using the right settings. I’ve seen hosts transform mediocre shots into compelling images just by adjusting a few key features.
Start by setting your resolution to the highest available. Sharp, detailed photos attract guests. Next, enable grid lines to apply the rule of thirds—position your bed or kitchen island along those lines for naturally balanced compositions that feel inviting.
Use HDR mode for rooms with mixed lighting. I’ve photographed countless spaces where bright windows clashed with dark corners. HDR captures both beautifully.
Manually adjust exposure to avoid blown-out highlights or murky shadows. Every detail matters when guests evaluate your listing. Finally, enable night mode for low-light bathrooms or bedrooms. This eliminates harsh artificial lighting that makes spaces feel cold.
These settings help tremendously. Still, professional photography delivers dramatically superior results that truly convert bookings.
Basic editing — what to adjust and what to avoid over-editing
Once you’ve captured your photos with solid smartphone settings, editing becomes your secret weapon—but only if you know where to draw the line.
Over-editing destroys authenticity. I’ve seen hosts brighten listings so much that rooms look unreal—and guests arrive disappointed. That’s a trust killer.
Focus on these adjustments:
- Brightness and contrast — Enhance clarity without washing out colors and details
- Saturation — Make colors pop, but keep hues realistic and true to your space
- Cropping — Improve composition by focusing on key features without cutting off important elements
- Noise reduction — Improve quality while preserving texture and detail
The real game-changer? Consistency. When every photo shares the same editing style, your listing feels polished and intentional.
Here’s what I tell hosts: your edits should feel invisible. If someone notices you’ve edited heavily, you’ve gone too far. The goal isn’t perfection—it’s representation. Professional photography handles this naturally, delivering results that editing alone simply can’t match.
The most common DIY Airbnb photo mistakes
I’ve reviewed hundreds of Airbnb listings, and I can tell you that most DIY photos fail for the same handful of reasons.
You’re probably shooting in poor lighting. Dim rooms make spaces feel cramped and unwelcoming—guests won’t book what they can’t see clearly. You’re also likely photographing cluttered spaces. That pile of laundry or stack of boxes? It distracts from your property’s best features and prevents guests from imagining themselves there.
Portrait mode is another killer mistake. It frames rooms too narrowly, cutting off essential details that showcase your space’s full potential. You’re missing angles and perspectives that highlight unique amenities—like that stunning kitchen island or cozy reading nook.
Finally, over-editing creates unrealistic expectations. When guests arrive to find dramatically different lighting or colors, they leave disappointed reviews.
These mistakes are fixable with effort. But here’s the truth: professional photographers know exactly how to avoid them and deliver the results that actually convert browsers into bookers.
When it’s time to invest in professional photography
When should you stop DIY photography and hire a professional? Here’s the truth: if your listing isn’t converting guests at the rate you’d hoped, professional photography could be your game-changer.
Consider investing in a professional shoot when you notice:
- Your booking rates lag behind similar properties in your area
- You’re unable to justify your nightly rate with current photos
- Guests mention disappointing photo-to-reality gaps in reviews
- Your listing feels outdated or visually inconsistent
Professional photographers bring advanced equipment and techniques—like HDR processing—that dramatically enhance your property’s appeal. They know exactly how lighting, angles, and staging work together to captivate potential guests.
The numbers speak loudly: hosts with professional photos see booking increases up to 20% and often command higher nightly rates. That investment pays for itself quickly. Your photos aren’t just pretty pictures; they’re your property’s first impression, your credibility marker, and your revenue driver. When DIY efforts plateau, professional photography isn’t an expense—it’s a strategic investment in your hosting success.
Frequently Asked Questions
How Often Should I Update My Airbnb Listing Photos to Stay Competitive?
You should update your Airbnb photos every 6-12 months to stay competitive. Refresh images seasonally, after renovations, or when your listing’s performance dips. Regular updates signal active management and keep your property looking current to potential guests.
What’s the Best Time of Day to Photograph My Rental Property?
Golden hour—shortly after sunrise or before sunset—works best for your rental. You’ll get warm, flattering light that minimizes harsh shadows. Avoid midday sun, which creates unflattering contrasts and washes out your property’s features.
Which Rooms Should I Prioritize Photographing First for Maximum Booking Impact?
You’ll want to prioritize your bedroom, bathroom, and main living spaces first. These rooms drive booking decisions most. Guests scrutinize where they’ll sleep and shower, so nail those before photographing secondary spaces like hallways.
Can I Use Photos From My Phone or Do I Need a DSLR Camera?
You can absolutely use your phone—modern smartphones take impressive photos. However, DSLRs offer better manual controls for lighting, focus, and composition, giving you a competitive edge that phone cameras struggle to match.
How Many Photos Does a Competitive Airbnb Listing Really Need to Succeed?
You’ll want at least 20-25 high-quality photos to compete effectively. That’s enough to showcase every room, key amenities, and outdoor spaces while giving potential guests confidence in booking your listing.
Conclusion
As an experienced Superhost in Charlotte, I can tell you that great listing photos are essential for standing out in a competitive market. Focus on lighting, choose your angles wisely, and make sure your smartphone settings are optimized. Subtle editing can enhance your images without losing authenticity. Remember, the right photos can dramatically increase your bookings and nightly rates. If you’ve done your best and want to elevate your listing further, consider professional photography. To learn more or to book a shoot, visit Charlotte Pixels. Your property deserves to be showcased effectively.